
beginner macro part 1: equipment
I learned how to use a camera by taking photos of birds. This was a completely different experience than capturing tiny critters like insects. It took time for me to transition from bird to macro photography, but I felt an urgency to figure it out when we had the 17-year and 13-year cicada overlap here in Chicago in 2024. Since then, I've been hooked. I had been overlooking so much tiny wildlife in the city, which I can now appreciate in new ways through macro photography.
This series of posts is written for people who are comfortable with a camera but haven't tried macro before. If the idea of shooting in manual mode is new to you, check Youtube to learn about how to balance aperture, ISO, and shutter speed on your camera, then get some practice shooting balanced photos in manual first.
Also, this series is not about taking professional macro shots. I am not stacking hundreds of photos to stitch together the perfect image that I desire. I just want to take clear, cool bug photos that are a step or two above "good enough for iNaturalist." Once in a while, I get awesome shots that I'm really proud of. But more often than not, I get a ton of really clear, great ID photos of amazing species that I've never seen before, and I'm quite happy with that.

camera and lens
I started macro with a Nikon D7500, but previously had worked with a D3500 and D5300 that could have given me a great start. Since then, I have moved onto a mirrorless camera (in celebration of a personal milestone) but the DSLR could take the same quality pictures that my upgrade can.
I exclusively use a Sigma 105mm macro lens. I experimented with shorter lens lengths before settling on 105mm, which has just enough reach to avoid scaring the subject by getting too close. Use a lens designed specifically for macro because they are engineered to allow you to get very close to your subject while the image stays sharp.
Want more zoom? Check out snap-on magnifiers like Raynox DCR-250 Super Macro Snap-On Lens. They require an extremely steady hand but are helpful for subjects that are smaller than a corn kernel.
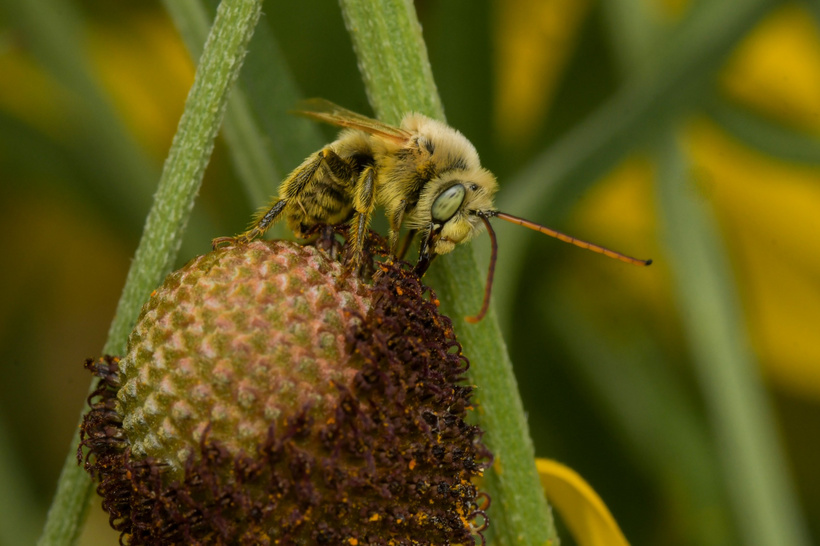 D7500, Sigma 105mm F2.8 DN Macro. Single shot.
I personally don't bother with all the accessories (flash, diffuser, etc.) if I am shooting casual macro on bright days. I used to lug the full set of equipment around all the time, but I found that they weighed me down. Now, when cloud cover gets dense or the sun goes down...
flash and diffuser
Flash is necessary when light is dim because of how tight your aperture needs to be for tiny subjects (explained in part 2.) You can definitely use your on-camera flash for quick photos, but I wanted to splurge on a nicer flash setup for the once-in-a-lifetime cicada event and our evening moth nights.
I use a GODOX V350N flash attached to my camera and an AK Diffuser to soften the light. Both the flash and AK Diffuser have been shoved in and out of backpacks, thrown around, and beaten up for two summers now with no sign of breaking down. Here's a Very Thorough video that will make flash much less scary.
When you use a flash without a diffuser, you can get harsh shadows and blown-out highlights. The diffuser basically creates a tiny lighting studio, filling in and smoothing shadows. You can make a DIY diffuser out of things lying around the house from paper towels to Pringles cans - more on that at the end.
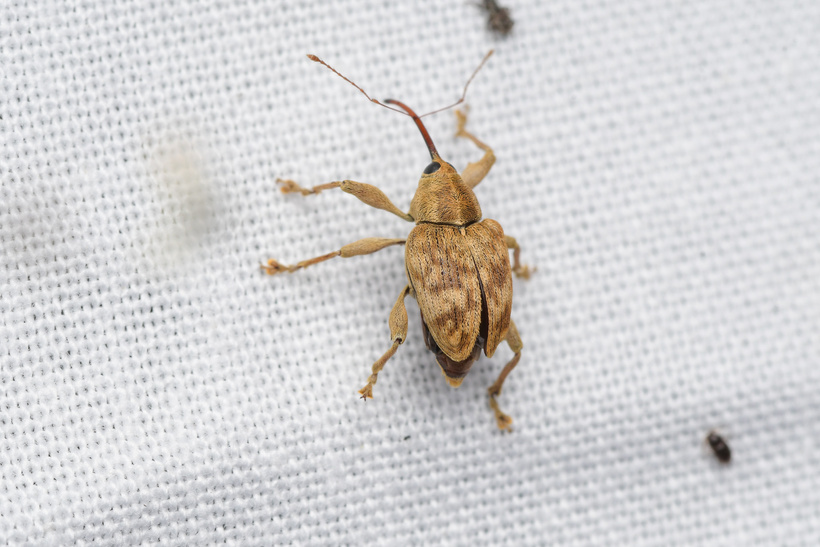 A weevil walking across a moth sheet around midnight. D7500, Sigma 105mm, GODOX V350N, AK Diffuser.
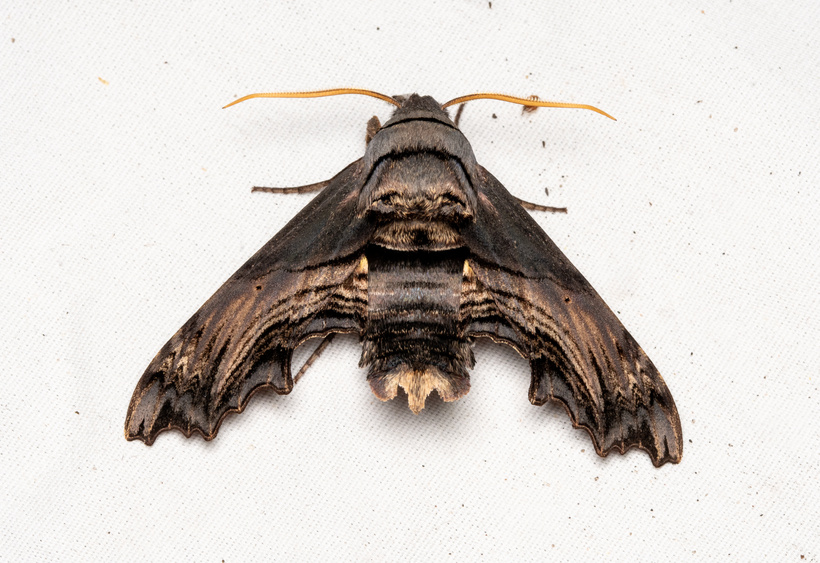 D7500, Sigma 105mm, GODOX V350N, AK Diffuser.
Whether or not to splurge on a flash set-up just depends on how you're using the photos. Want basic identifiable photos for iNaturalist? It's probably overkill, so just use your on-camera flash. Want something a little nicer? It undeniably makes a huge difference for picture quality, so go for it.
other macro hardware thoughts/accessories/setups
It's easy to get overwhelmed by the equipment, but if you're nervous, start by messing around with just a 105mm macro lens. You can get the Sigma for about $350 used (or cheaper on ebay), and it'll teach you a lot about how the limitations you run into when taking photos of tiny subjects. Make sure to get the lens that is compatible with your camera brand.
Every photographer has a different setup depending on what their preferences are, what they're taking photos of, and what was on sale while they were shopping. Check out what other people are doing, like this compelling Chasing Bugs post about Reverse Lens Macro Photography.
A lot of people skip the custom fancy flash diffuser, opting to make one at home. One of my favorite corners of the internet are old photography forums where people show off their homemade solutions created from dish soap containers, duct tape, and pillowcases. One of the classic DIY diffuser designs is made with two Pringles cans. I think it's genius.
Macro can get much more complicated than this, of course- you can get a tripod and macro rail for super precise focus stacking, studio lighting that you can set up in your home, etc. But the core skeleton of macro can be a very simple setup- which is where I recommend starting (and where I have the most fun.)
Ready to get started? Let's talk camera settings in the next post.