
beginner macro part 2: settings
Insects like to move quickly, hide in leaf clutter, and leap away as soon as you get them in focus. There are a lot of challenges in macro photography, but practice and patience will make the process feel intuitive over time!
There's a lot of important vocabulary in this post. If you are new to using a camera and find it confusing, I would recommend finding a video on Youtube about how to shoot in Manual mode (manually controlling aperture, ISO, and shutter speed.) Practice taking photos of anything larger (friends, buildings, your dog) in Manual mode for a bit, then come back, and this post should make more sense to you.
Let me reiterate that these are not settings for professional macro photography, in which every single hair on a sweat bee is in perfect focus. We are trying to just take clear photos that occasionally make us go "wow!" without getting too overwhelmed by complex equipment or process. The suggestions in this post are rough recommendations, not prescriptive. Start here, read other folks' suggestions on the subject, then get outside and play.
TL,DR:
Here are my short, sloppy lists of my approximate settings for when I am shooting bugs. I usually start here and then adjust accordingly.
Daylight (without flash)
- Manual mode & manual focus
- Aperture: f/11-f/16
- Shutter speed: 1/200-1/250s
- ISO: 650-1000
- Multiple exposure (10+fps)
- Focus peaking ON if your camera is fancy enough to have it
Dark/dim (with flash)
- Manual mode & manual focus
- Aperture: f/11-f/16
- Shutter speed: as fast as flash will allow. Usually 1/250s
- ISO: as low as possible, always under 500
- Single exposure (if the subject is still, to avoid blasting through my flash battery)
- GODOX flash, TTL mode, power between 1/16 and 1/8
Got a few minutes to keep reading? Let's get into the meat of it.
shoot in manual mode
I've talked to beginner photographers that said they had extremely variable results from their camera. 95% of time, it is because they are not shooting in manual mode.
Explaining how to shoot in manual (when you control the ISO, aperture, and shutter speed) is beyond the scope of this post. There are already a lot of really great, free resources out there to explain how, and I promise that it becomes intuitive with practice. You absolutely can play around with Auto ISO to ease into manual, but shooting in manual is the only way to get truly predictable results.
This is very important with macro bug photography because if one of your settings is jumping around, you're going to get blurry photos, you'll get disappointed, and it'll be hard to keep going.
Head over to youtube and start learning manual mode. I believe in you.
shoot with manual focus
"Another thing I have to do manually??" Okay, okay, don't yell at me. For really small subjects, it's just not worth fighting autofocus. Shooting with manual focus actually is easier for macro than autofocus. I'll explain it step-by-step in part 3.
aperture (why macro requires so much light)
When you shoot a landscape during the day (or even a person who is a few feet away), your lens is taking in a huge amount of light. When you take a photo of a tiny subject like a ladybug, you are working with an infinitesimally smaller depth of field and volume of light.
That razor-thin depth of field drives this lack of light. While you can take a photo of a landscape with a narrow aperture with the whole scene (perhaps miles deep!) in focus, you may take a photo with the same aperture of a ladybug and see only a fraction of it is sharp.
These were both shot with F/16 aperture:
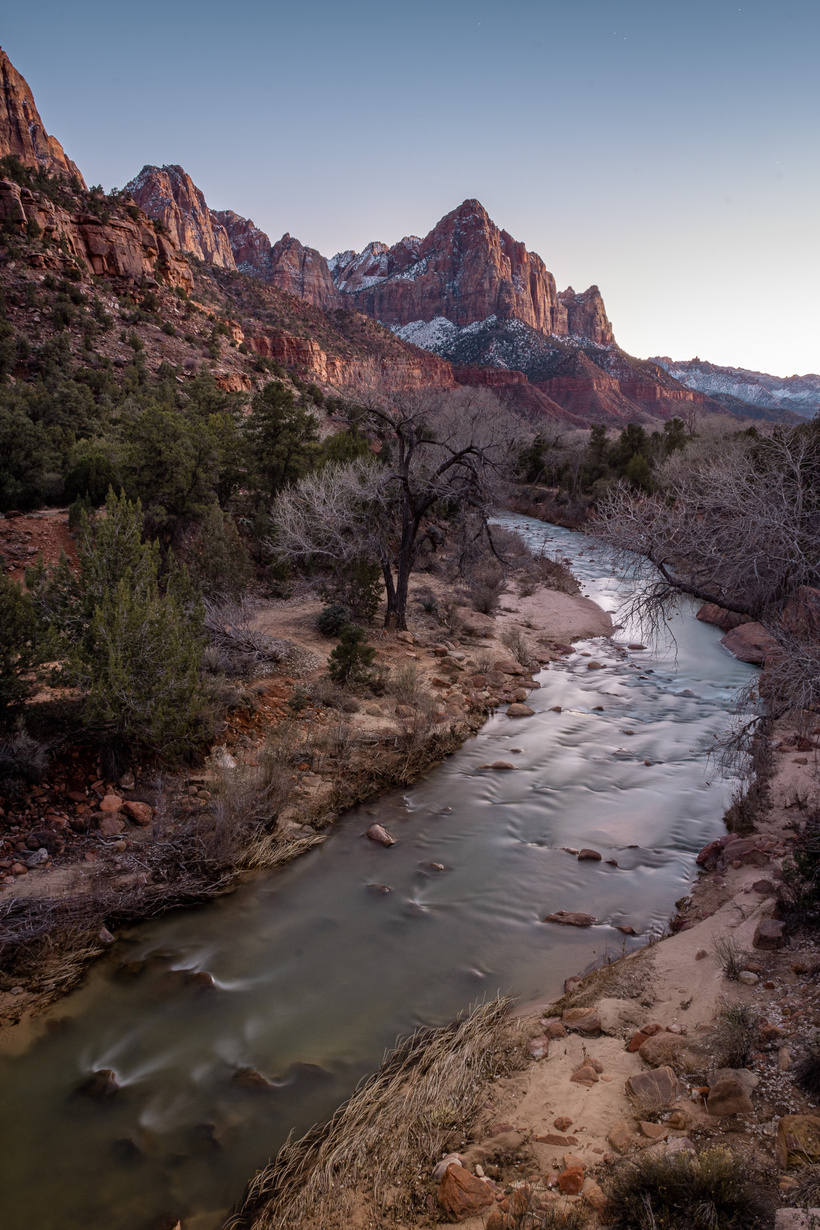
F/16: Zion National Park's scenery is entirely in focus (other than the Virgin River's motion blur.) Depth of this image is almost 3 miles deep. The volume of light bouncing off of a landscape is huge.
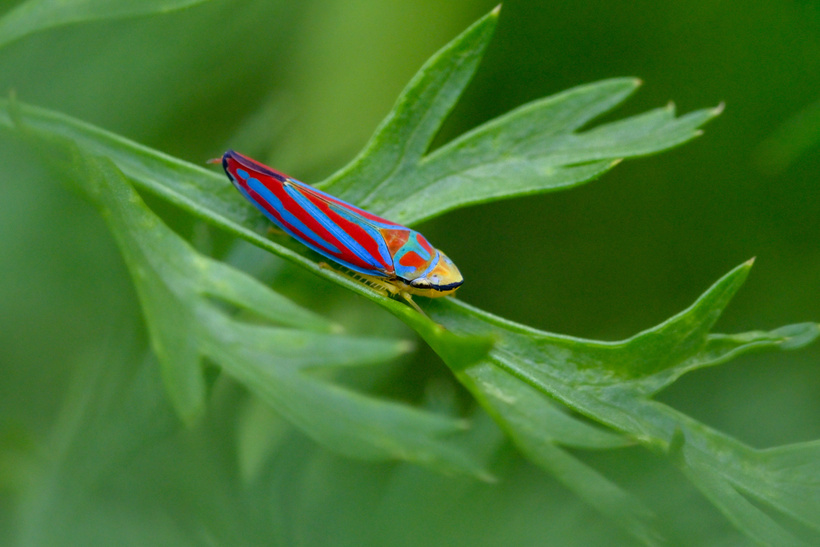
But when we are taking closeups or photos of itty bitty subjects, most of the photo falls into distance blur because the depth of field is so incredibly small.
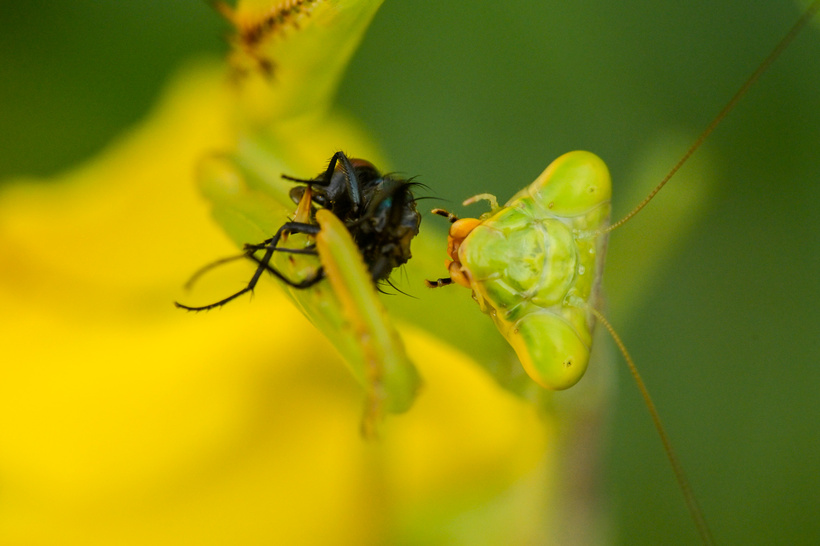 F/16: a mantis less than 7 inches from my camera disappears into blur. Depth of this image is a few inches deep. The volume of light bouncing off of a single bug is miniscule.
For larger subjects like butterflies during daylight, we can take photos with a more open aperture (like f/8) and see most of the subject clearly. This is especially true if those big wings are flat to camera- the same distance from the lens from wingtip to wingtip.
Flash is so important for a lot of macro because it allows you to shrink your aperture without having to greatly increase your ISO or shorten your shutter speed. Focus stacking (taking a bunch of photos with parts in focus, then blending them together using software like Photoshop) is a pro-level workaround, but that is a chat for another day.
shutter speed
When taking photos of motionless subjects, the shutter speed can be as long as you want. This is especially true with tripods, but I'm a lazy bum that hates carrying tripods around. My shutter speed is limited to how still I can handhold my camera- usually around 1/125sec if I'm not trying to take tack-sharp photos. You can go lower if you brace your body/camera against a tree/rock/etc.
Fast subjects require faster shutter speed to avoid motion blur. Small subject + fast subject + dim light is the perfect storm, but you can still get a shot by using flash. That said, flash will limit your shutter speed so that your flash can accurately sync to your camera. Using my GODOX, I cannot shoot faster than 1/250sec.

ISO
You want your ISO to be as low as possible. I aim for under ISO 500. I don't like over-relying on digital noise reduction tools such as in Lightroom because I find they make images look unnatural above a certain strength.
Some people use flash even in daylight so they can keep their ISO at 125 or lower, but I prefer the tradeoff of bumping up my ISO to around 500 so I can keep my equipment light. That sort of decision is ultimately up to personal preference.
other stuff
Check your white balance (I basically always use the Sunny or Cloudy options).
Turn focus peaking on if you have a fancy camera (it usually only works while Manual focus on selected.)
I don't use in-camera vibration reduction.
Play around with different Continuous burst speeds. More on this in part 3.