
beginner macro part 3: take the shot
We have our equipment, we have some basic settings, and now it's time to go actually go get our macro shots.
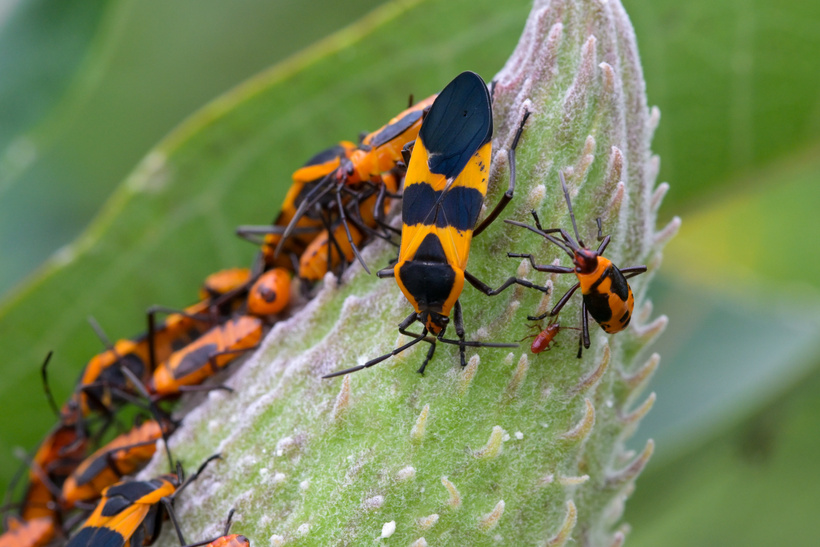
Start by finding a subject! I was amazed by how many insects I found when I slowed down to look around in dense vegetation. Look in sunny places on warm days, gently look through leaf litter and near fallen logs, or on blooming native flowers. Spend as much time on this stage as you want- hours, days, weeks.
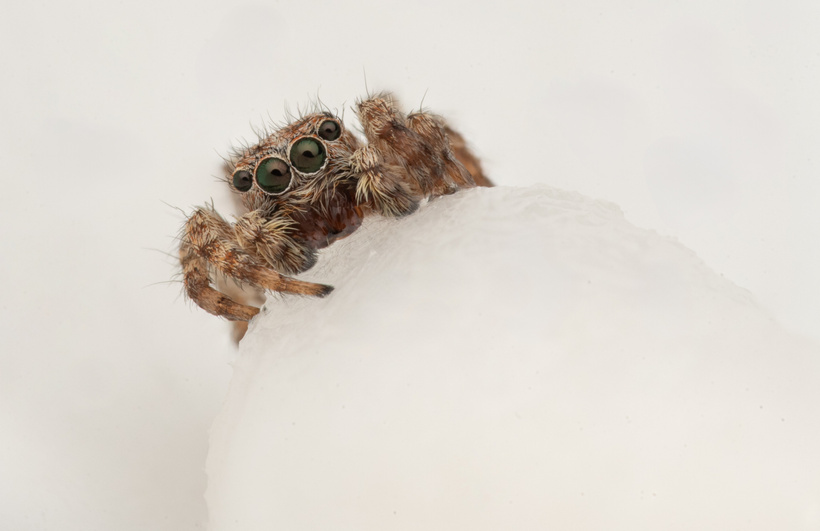
After you find a subject, take a moment to pause and consider how you want to set up your photo. Don't rush it unless they're scurrying away! Do you want to focus on the face or body? What's the best angle? What do you want the background to look like? You only get this moment to decide on your composition, so give yourself time to be intentional.
One hot tip: take as much time as you can with cooperative subjects that are doing something cool or don't move much. That could be the most exciting thing you see that day, so don't rush off. I have spent hours with a single insect because I know what it's like to snap a few photos of something, walk away, and then wish I had spent more time with it. You never know when you will see that critter again, so don't take that chance for granted!
Now let's shoot!
-
Prep your camera settings beforehand. We don't want to miss an opportunity because we were birding yesterday with 1/2500 shutter speed. Take a few test photos of a leaf or other proxy subject to get your exposure (ISO, shutter sp, aperture, flash, white balance) right.
-
Approach your subject and frame the shot. Adjust the manual focus ring to roughly have the subject in focus how you want.
-
Now we start shooting. Stop trying to focus with the focus ring. The depth of field here is too precise to set up perfect focus and take a single shot. Instead, get the focus just right by gently rocking your body/camera forwards and backwards while taking bursts. You only need to move the camera about an inch- even less for very small subjects, perhaps millimeters. I usually do bursts of 7-10 shots in each set. You can do infinitely more, but I find that cumbersome to sort through.
-
Take as many bursts of photos as you want! Err on the side of more photos rather than less.
-
Delete the photos in which the subject was not in focus, and keep the good ones. I generally keep less than 10% of my photos when shooting macro in burst mode.
The process is very similar with flash. I just make sure that my flash is working during step 1, and I sometimes turn down the continuous burst setting to 5 fps or so if I'm going to be using my flash for several hours (or days while traveling) without a way to charge it. I personally don't bother with flash compensation settings because I am lazy- I just take test shots and adjust the flash strength until I am satisfied.
That's it! I can walk around and do this for hours. I love how much more I notice in my environment when I take time to do this a few times each week.
It takes some practice, but I get so excited when I took at the photo I took and whisper "wow!" to myself. There are so many things invisible to the naked eye that become crystal clear with macro photography. I hope that you find this useful and are inspired to go find what's in your neighborhood! Feel free to comment with any questions or ideas.